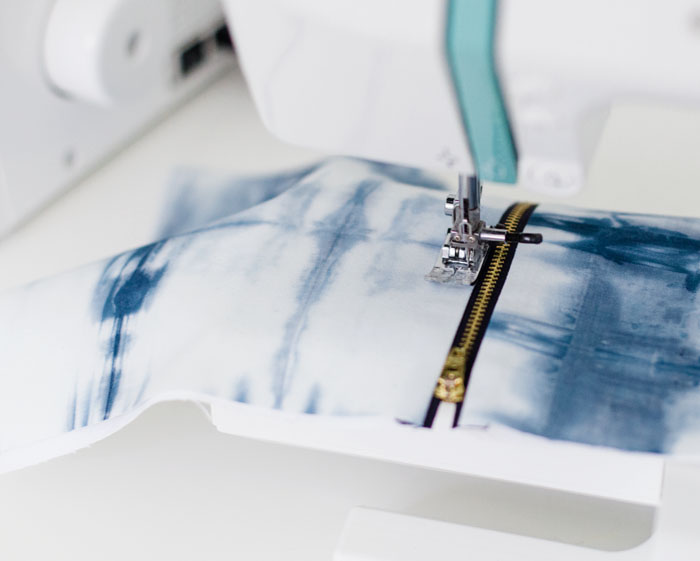
I worked on a fun project this weekend - shibori dyeing! I've dyed fabric before with less than stellar results so I was a little nervous going in but managed to get some pretty cool results! Kollabora and Jo-Ann have teamed up to create some cool craft tutorials including how to make a shibori tablecloth, a zipper pouch diy, and stamped leather coasters. I used all three tutorials to create the pouch I'm sharing here. I absolutely love my pouch and still have lots of cool fabric left over for future projects!
I used a shibori dye kit (you'll find the details here) which includes most of what you'll need along with a some white cotton fabric, 5 gallon bucket and lid, extra gloves, extra wood resist pieces, a wooden stick for stirring the dye, and an old plastic tablecloth as a drop cloth. I had 1 1/2 yards of white "prepared for dyeing" Kona which I cut into 2 1/2 yard pieces and 2 fat quarters. Using the instruction booklet (and Pinterest) as a guide, I mixed up the dye and then folded up the each piece of fabric differently. Once the dye was ready, I submerged each bundle into the dye for a few minutes. The fabric is green when it first comes out of the dye and slowly turns to a pretty shade of indigo. I repeated the dye process to make sure I got a nice bright blue. I let the fabric dry overnight before rinsing, washing, and drying.
TIP - get some elbow length industrial strength gloves. The ones in the kit don't cover enough skin and the latex cleaning gloves I used leaked dye so I'm sporting a blue finger!
It's a little like opening presents when it's time to unwrap the fabric as the result is a nice surprise!
Once my fabric was ready, I cut two pieces 9.75" x 7.75" along with some interfacing and canvas lining pieces. I used a 9" brass jeans zipper which was a good match for dyed fabric. The pouch is a super quick sew. I decided to add a leather label to the pouch and created it using a scrap piece of leather, an alphabet stamping kit, a leather hole punch, and attached it to the pouch with embroidery floss.
To check out all the tutorials Kollabora + Jo-Ann have put together, click here! To see more photos of my project, check out my Instagram.
*sponsored post


I love this! And the leather label you added is just perfect! I have too look into this technique a bit more, it's so interesting!
ReplyDeleteThis is fantastic, Vanessa! I love that you used all three tutorials to make one item. The stamped leather tag is so unique. And the photos are gorgeous.
ReplyDeleteThis comment has been removed by a blog administrator.
DeleteSo cool! Love it. The leather details go perfectly with the fabric.
ReplyDeleteI LOVE this pouch. It's super pretty!
ReplyDeleteHow fun. Have wanted to try dying again. It's been ages.
ReplyDeletethis is so lovely! and love the extra detail the stamped leather tag gives it. Perhaps we'll see a shibori dyed outfit for Sydney one day?:)
ReplyDeleteThe leather label is genius - I have to try that!
ReplyDeleteIt's beautiful, Vanessa! I'm about to do some shibori dyeing with my son's class next week; this is very inspiring :)
ReplyDeleteLove your labels. You are awesome at what you do!!
ReplyDeleteThis comment has been removed by a blog administrator.
ReplyDeletebellisimo voy a intentarlo gracias por compartir
ReplyDeleteThis comment has been removed by a blog administrator.
ReplyDeleteGood day! This is my first comment here so I just wanted to give a quick shout out and say I truly enjoy reading through your articles.
ReplyDeleteCan you recommend any other blogs/websites/forums that deal with the same subjects? Appreciate it!
Shivratri Date In 2016
Maha Shivratri 2016 Date
www.mahashivratri2016images.in
mahashivratri2016images.in
Maha Shivratri History
Maha Shivratri Images
Maha Shivratri Pictures
Shivratri Wallpapers 2016
Shivratri SMS Shayari
Maha Shivratri Wishes
Holi 2016 Wishes
Holi Wallpapers 2016
Happy Holi 2016 Wallpapers
www.holi2016wishes.in
Happy Holi Images 2016
Holi Hindi Shayari 2016
Holi 2016 Mp3 Mix Songs
Happy Holi Cards 2016
Holi Shayari
Holi SMS
Holi Funny Pictures
Thanks for the good article, enjoyed a lot
ReplyDeletewomen's day status
women's day quotes
womens day images
mothers day images
mothers day pics
sslc result 2016
10th result 2016
sslc result 2016 kerala
cbse result 2016
cbse 10th result 2016
happy easter images
easter wishes
easter greetings
easter cards
good friday 2016 images
holi images 2016
Holi wishes 2016
Happy Holi wishes
This is fantastic. Congrats to you man!
ICC T20 World Cup 2016 Netherlands Team Squad
ReplyDeleteICC T20 World Cup 2016 New Zealand Team Squad
ICC T20 World Cup 2016 Ireland Team Squad
women's day status
ReplyDeletewomen's day quotes
womens day quotes
women's day images
womens day images
womens day wishes
women's day wishes
Easter Sunday animated Pictures
ReplyDeleteThis comment has been removed by a blog administrator.
ReplyDelete